How to deploy or host Hugo Website for free: Part 4
Table of Contents
Getting started with Hugo - This article is part of a series.
Hugo generates static files (HTML) that can be hosted anywhere. In this blog post, lets look at hosting your Hugo website for free using Netlify and Github.
The Hugo documentation has resources on hosting on other platforms.
What we’re going to be doing is setting up a CI/CD (Continous Integration/Continous Deployment) routine so our website can be easily maintained and the hosting platform automatically builds and deploys the site whenever we push any changes to our website’s repository on GitHub.
Hosting Hugo website with Netlify #
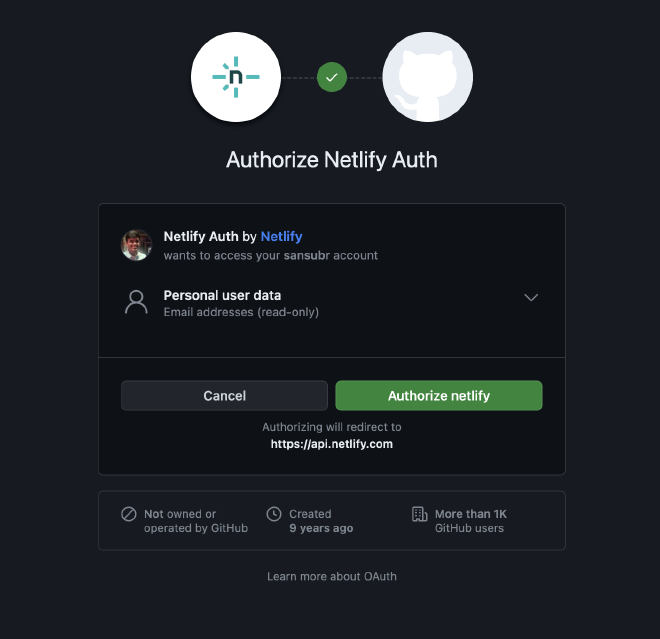
Go to Netlify and create an account with whichever method you’re comfortable with. If you’re choosing GitHub, you should see a screen like this.
Add a new site and choose your repository unless you haven’t named it my-website lol.
Choose the repo and select the main branch since that’s where we have been pushing our website so far, remember?
Make sure the build command says hugo since Netlify actually runs the hugo command to build the site whenever it detects a change to our repository. This is the coolest part about hosting on Netlify - but more on this later.
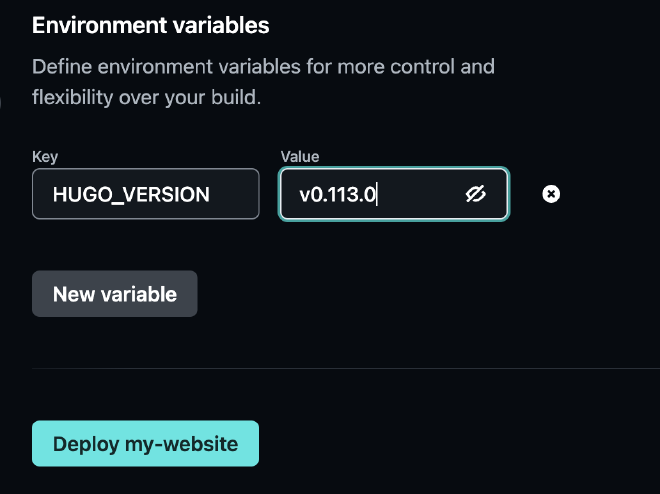
Next, we need to specify the hugo version we’re using at our end to build the site so Netlify is also using the same version for consistency.
To find your hugo version, type hugo version in your terminal or PowerShell.
sansubr@Santoshs-MacBook-Air my-website % hugo version
hugo v0.113.0+extended darwin/arm64 BuildDate=unknown
sansubr@Santoshs-MacBook-Air my-website %
What we’re looking for is the v0.113.0 number here.
Click on the new ENVIRONMENT variable, add HUGO_VERSION and the version number.
It is now deploying the site. This usually takes a few minutes.
Finally, our site is deployed!
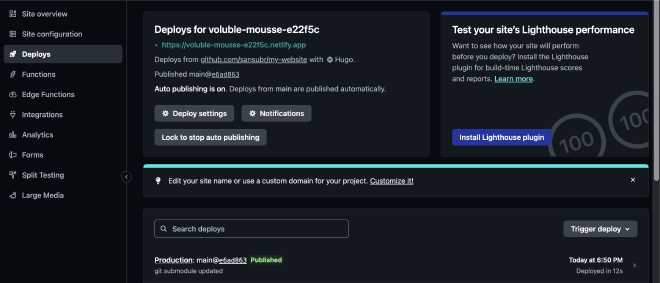
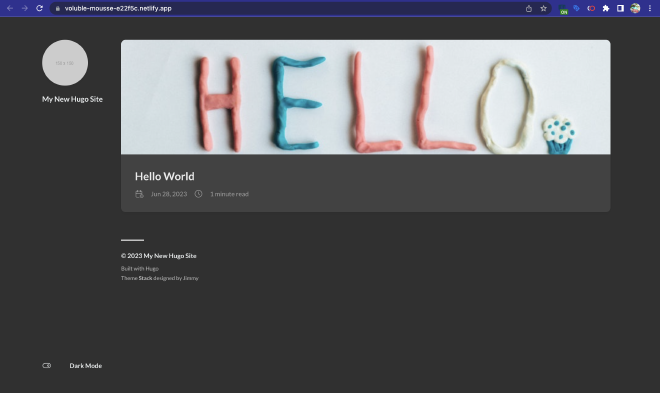
To change the name of the site, go to site configuration and select the change site name option to rename it to something you want.
There is also the option to connect your own domain to this site on the domain management section where you can add a domain you already own or buy one from Netlify - we’ll look at this in a different post. I will link that here when I’ve written that guide.
Hosting Hugo website on GitHub with GitHub Pages #
GitHub Pages offers free hosting for a specific repository however, there is are certain requirements for this.
- The repository’s name should be yourusername.github.io for this to work.
- The repository needs to be public. This does not work with private repos. If you want to use a private repo, you must upgrade to a paid plan on GitHub.
On the free plan, GitHub pages only offers one site per account.
Please follow these next steps carefully.
First, change our repo’s visibility from private to public. You can do this under the settings page under the Danger Zone section. Github is going to ask you to confirm this and enter your password again.

Now, lets change our repo name to the format specified by Github Pages. Simply go to your repo on GitHub, go to settings and change the name to yourusername.github.io like the in the screenshot. My username is sansubr, so my repo is sansubr.github.io
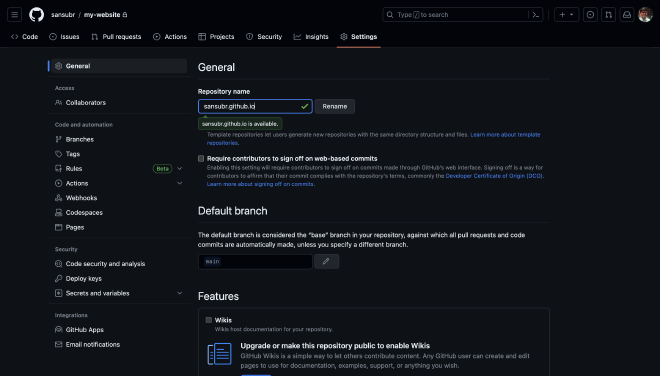
Now that this is done, we need to tell GitHub how to build our website. In the settings tab, go to the pages menu and under Build and Deployment choose GitHub Actions.
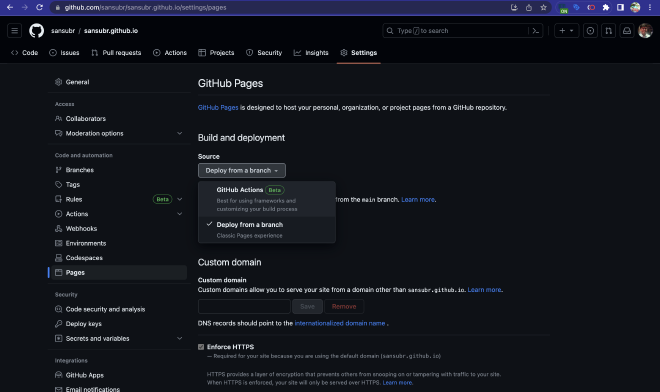
It will say our page is deployed and the site is live, however, if you visit the link, you will see a 404 page. This is because we need to tell GitHub what actions to take when we make changes to the repo.
Click on the browse all workflows link just below the GitHub actions drop down. On this page, search for Hugo and click on the configure button.
What GitHub just did is create a file called hugo.yml under a directory .github/workflows.
Change the HUGO_VERSION: 0.113.0 in the file and click the Commit changes.. button on the top-right. Add a message that you want in the box and click on commit to main branch.
Lets head to the Actions tab now where you’ll see that it is either running the new action or has completed the new action. Click on it to get details like so..
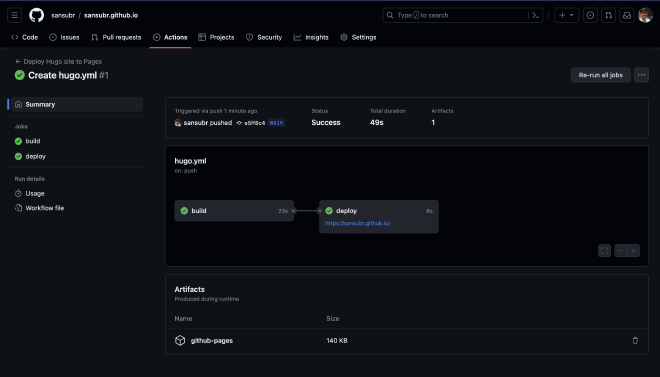
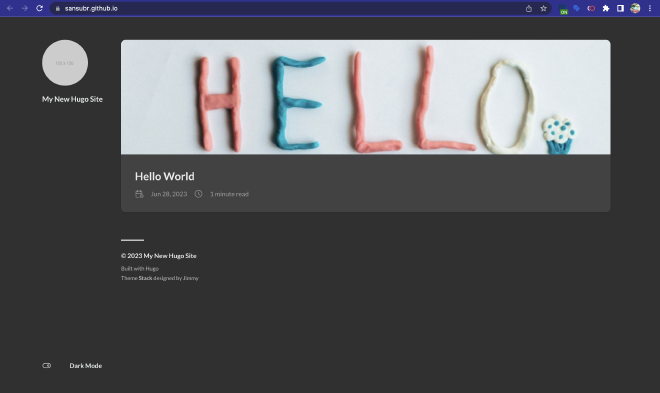
Our site is now LIVE and deployed on the URL!
Now, the next time we want to make any changes to the site, the first thing to do is a pull command so the local repo is synced and consistent with the remote repo.
sansubr@Santoshs-MacBook-Air my-website % git pull origin main
remote: Enumerating objects: 6, done.
remote: Counting objects: 100% (6/6), done.
remote: Compressing objects: 100% (3/3), done.
remote: Total 5 (delta 1), reused 0 (delta 0), pack-reused 0
Unpacking objects: 100% (5/5), 1.69 KiB | 289.00 KiB/s, done.
From https://github.com/sansubr/sansubr.github.io
 * branch            main       -> FETCH_HEAD
   0a512aa..e5ff8c4  main       -> origin/main
Updating 0a512aa..e5ff8c4
Fast-forward
 .github/workflows/hugo.yml | 75 ++++++++++++++++++++++++++++++++++++++++++++++++++++
 1 file changed, 75 insertions(+)
 create mode 100644 .github/workflows/hugo.yml
That’s it! We’re now ready to add more content to our website, push changes to the repo and watch the changes go live instantly on the new URL.
You can also add your own custom domain to GitHub pages on the page section of the settings tab.
Series conclusion #
I hope this series was helpful and useful to getting started with Hugo. If you have any questions, please feel free to put them in the comments box.
Keep experimenting with new themes, content types and designs on your new Hugo website. Good luck!