Create Content on Hugo Website: Part 3
Table of Contents
Getting started with Hugo - This article is part of a series.
Now we’re ready to create content on our Hugo website. If you are new to this “Getting started with Hugo” series, I recommend you read the first two parts to get yourselves familiarized with what’s been going on.
Okay, let’s get started.
Creating content on Hugo #
Say we’re looking to create a new blog post on the site titled “Hello, World!,” this is how we would do it.
Go to your terminal and type hugo new posts/hello-world.md
Hugo should have created a new hello-world.md file under the posts directory. You can say blogs instead of posts if you want - this is your way of organizing content.
Learn more on organizing content on Hugo’s documentation.
sansubr@Santoshs-MacBook-Air my-website % hugo new posts/hello-world.md
Content "/Users/sansubr/site/my-website/content/posts/hello-world.md" created
The hello-world.md file has the .md extension because we’re going to be writing content in the Markdown format like we discussed before.
Here’s a Markdown cheat sheet that I use. The syntax is pretty simple and straightforward.
Now, let’s go to our code editor (I have Visual Studio Code) and open the folder so it is easy for us to work with the entire site.
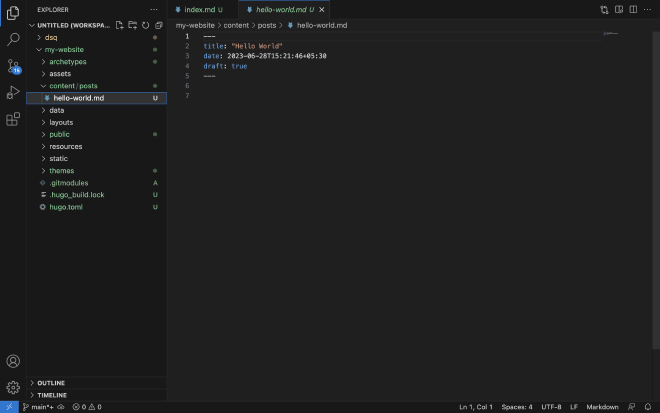
What is Front Matter in Hugo #
The thing you see on the page is the Front Matter. This is a way for us to give Hugo metadata about this page like the title, author, featured image, date published, date updated, keywords and so on. Here’s a full list of Front Matter variables that can be used on according to Hugo’s documentation.
Let’s add content on this page.
---
title: "Hello World"
date: 2023-06-28T15:21:46+05:30
draft: true
---

# Hello World!
Welcome to my website. This is the first blog post!
Let’s go to localhost:1313 in our browser since the Hugo server is running and you should see

Why can’t we see the blog we just created?
Change draft value in Front Matter #
That’s because if you notice the Front Matter on our blog post, you’ll see that the draft value is set to true which means this page is in a draft stage and this is why Hugo doesn’t show the page on the site.
This is good for building in some cases, but not really in our case where we are infact previewing locally. So let’s change this to draft:false so the page is picked up by Hugo and built.
Telling Hugo what to show on the home page #
After this, you will still see nothing on the website.
This is because the other thing we need to do is tell Hugo what type of content should be displayed on the home page on the hugo.toml config file.
This is how your config file should now look like by adding the [params] to it.
baseURL = 'http://example.org/'
languageCode = 'en-us'
title = 'My New Hugo Site'
theme = 'hugo-theme-stack'

[params]
mainSections = [ "posts" ]
featuredImageField = "image"
Since we created the hello-world post under posts, we’re telling Hugo to pick up this section as the main section to show on the home page.
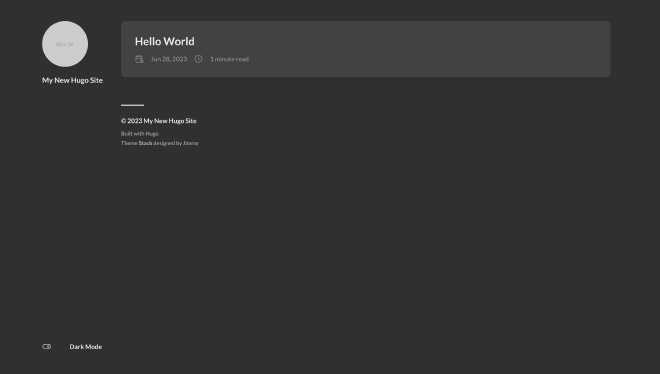
Let’s save this and you will notice the website now shows our Hello, World! post!
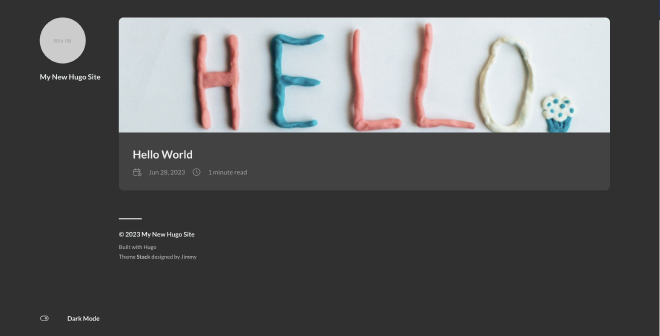
We added a featuredImageField = "image" value so we can add a featured image to our blog post using the image attribute. Let’s try that.
Add image = "posts/your-image.jpg" to your Front Matter for Hugo to pick up your image. This is how it should look. Make sure to use the right path.
Now that we have our content up on the site, lets talk about hosting this website for the public to see.
Moving all content to a Git repository #
Since we discussed using Git for versioning and Github for storing the contents of this project, lets create a repository on Github, add a name. Choose the contents to be private and click the create repository button at the bottom.
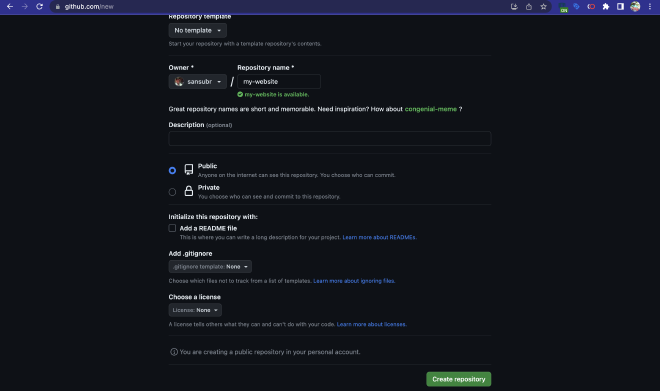
This repository is the source for our hosting to pick up contents of our website and host it.
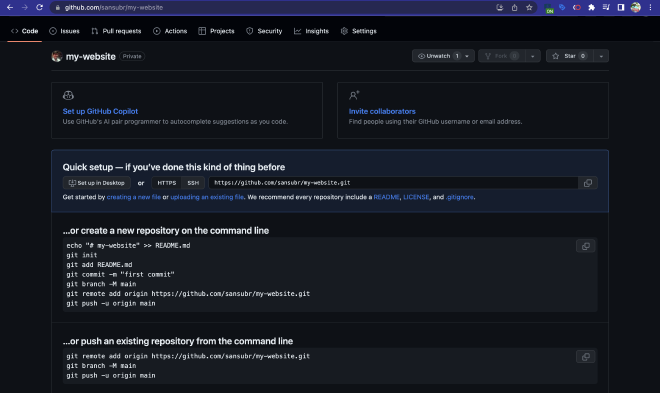
Lets tell our local repository that we now have a remote repository we need to push changes to using the command that Github is telling us.
sansubr@Santoshs-MacBook-Air my-website % git remote add origin https://github.com/sansubr/my-website.git
sansubr@Santoshs-MacBook-Air my-website % git branch -M main
sansubr@Santoshs-MacBook-Air my-website %
Before we put the final command in, that is, before we push anything to the remote repository, we need to ensure our local repo is up to date.
The git status command helps see changes to our local repository so we know what changes were made and so we can commit those changes to the local repository before we push them to the remote repository on GitHub.
sansubr@Santoshs-MacBook-Air my-website % git status
On branch main

No commits yet

Changes to be committed:
  (use "git rm --cached <file>..." to unstage)
	new file:   .gitmodules
	new file:   themes/blowfish

Changes not staged for commit:
  (use "git add/rm <file>..." to update what will be committed)
  (use "git restore <file>..." to discard changes in working directory)
	deleted:    themes/blowfish

Untracked files:
  (use "git add <file>..." to include in what will be committed)
	.DS_Store
	.hugo_build.lock
	archetypes/
	assets/
	content/
	hugo.toml
	public/
	resources/
	themes/.DS_Store
	themes/hugo-theme-stack/

sansubr@Santoshs-MacBook-Air my-website %
As you can see, these are files that we made changes to so far. Let’s first add these changes to our repository using the command git add . The . (dot) here selects all the files and adds changes to our repository, since we have more than one file we made changes to.
sansubr@Santoshs-MacBook-Air my-website % git add .
warning: adding embedded git repository: themes/hugo-theme-stack
hint: You've added another git repository inside your current repository.
hint: Clones of the outer repository will not contain the contents of
hint: the embedded repository and will not know how to obtain it.
hint: If you meant to add a submodule, use:
hint:
hint: 	git submodule add <url> themes/hugo-theme-stack
hint:
hint: If you added this path by mistake, you can remove it from the
hint: index with:
hint:
hint: 	git rm --cached themes/hugo-theme-stack
hint:
hint: See "git help submodule" for more information.
The next step is to commit these changes to our local repository using the command git commit -m "first commit". Note the use of the flag -m so we can add a message that will help us identify what changes we did during each session.
When your site grows and you add more authors or designers or developers, this is useful to track historical changes.
sansubr@Santoshs-MacBook-Air my-website % git commit -m "first commit"
[main (root-commit) 4146e07] first commit
 19 files changed, 90 insertions(+)
 create mode 100644 .DS_Store
 create mode 100644 .gitmodules
 create mode 100644 .hugo_build.lock
 create mode 100644 archetypes/default.md
 create mode 100644 assets/jsconfig.json
 create mode 100644 content/.DS_Store
 create mode 100644 content/posts/.DS_Store
 create mode 100644 content/posts/hello-world.md
 create mode 100644 content/posts/pexels-maria-tyutina-954599.jpg
 create mode 100644 hugo.toml
 create mode 100644 public/categories/index.xml
 create mode 100644 public/index.xml
 create mode 100644 public/sitemap.xml
 create mode 100644 public/tags/index.xml
 create mode 100644 resources/_gen/assets/scss/scss/style.scss_511aa33e99371f93fbf403479ebfd32e.content
 create mode 100644 resources/_gen/assets/scss/scss/style.scss_511aa33e99371f93fbf403479ebfd32e.json
 create mode 100644 resources/_gen/images/avatar_huda2458f72ce188392d75c5d51cd8e24e_373_300x0_resize_box_3.png
 create mode 100644 themes/.DS_Store
 create mode 160000 themes/hugo-theme-stack
 sansubr@Santoshs-MacBook-Air my-website %
Now, we’re ready to enter the last command to push these changes to our remote repository. Use the command git push -u origin main to push changes in our local repo to the remote repo. Since this is the first time we’re doing this, it is going to basically send everything to the remote repo.
sansubr@Santoshs-MacBook-Air my-website % git push -u origin main
Enumerating objects: 34, done.
Counting objects: 100% (34/34), done.
Delta compression using up to 8 threads
Compressing objects: 100% (26/26), done.
Writing objects: 100% (34/34), 46.50 KiB | 23.25 MiB/s, done.
Total 34 (delta 5), reused 0 (delta 0), pack-reused 0
remote: Resolving deltas: 100% (5/5), done.
To https://github.com/sansubr/my-website.git
 * [new branch]      main -> main
branch 'main' set up to track 'origin/main'.
sansubr@Santoshs-MacBook-Air my-website %
Now that we have created our content and readied our remote repo, lets look at hosting this website in Part 4 →
(Part 4 coming soon!)